


For months now, our minds have been percolating around a solution for mounting comms devices on the console. Ideally, we’re looking for space to mount 2 mobile devices, an InReach, and a GMRS radio. It’s been a bit of a slow process in between other work, but this is how we created our newest product: The Comms Rail.
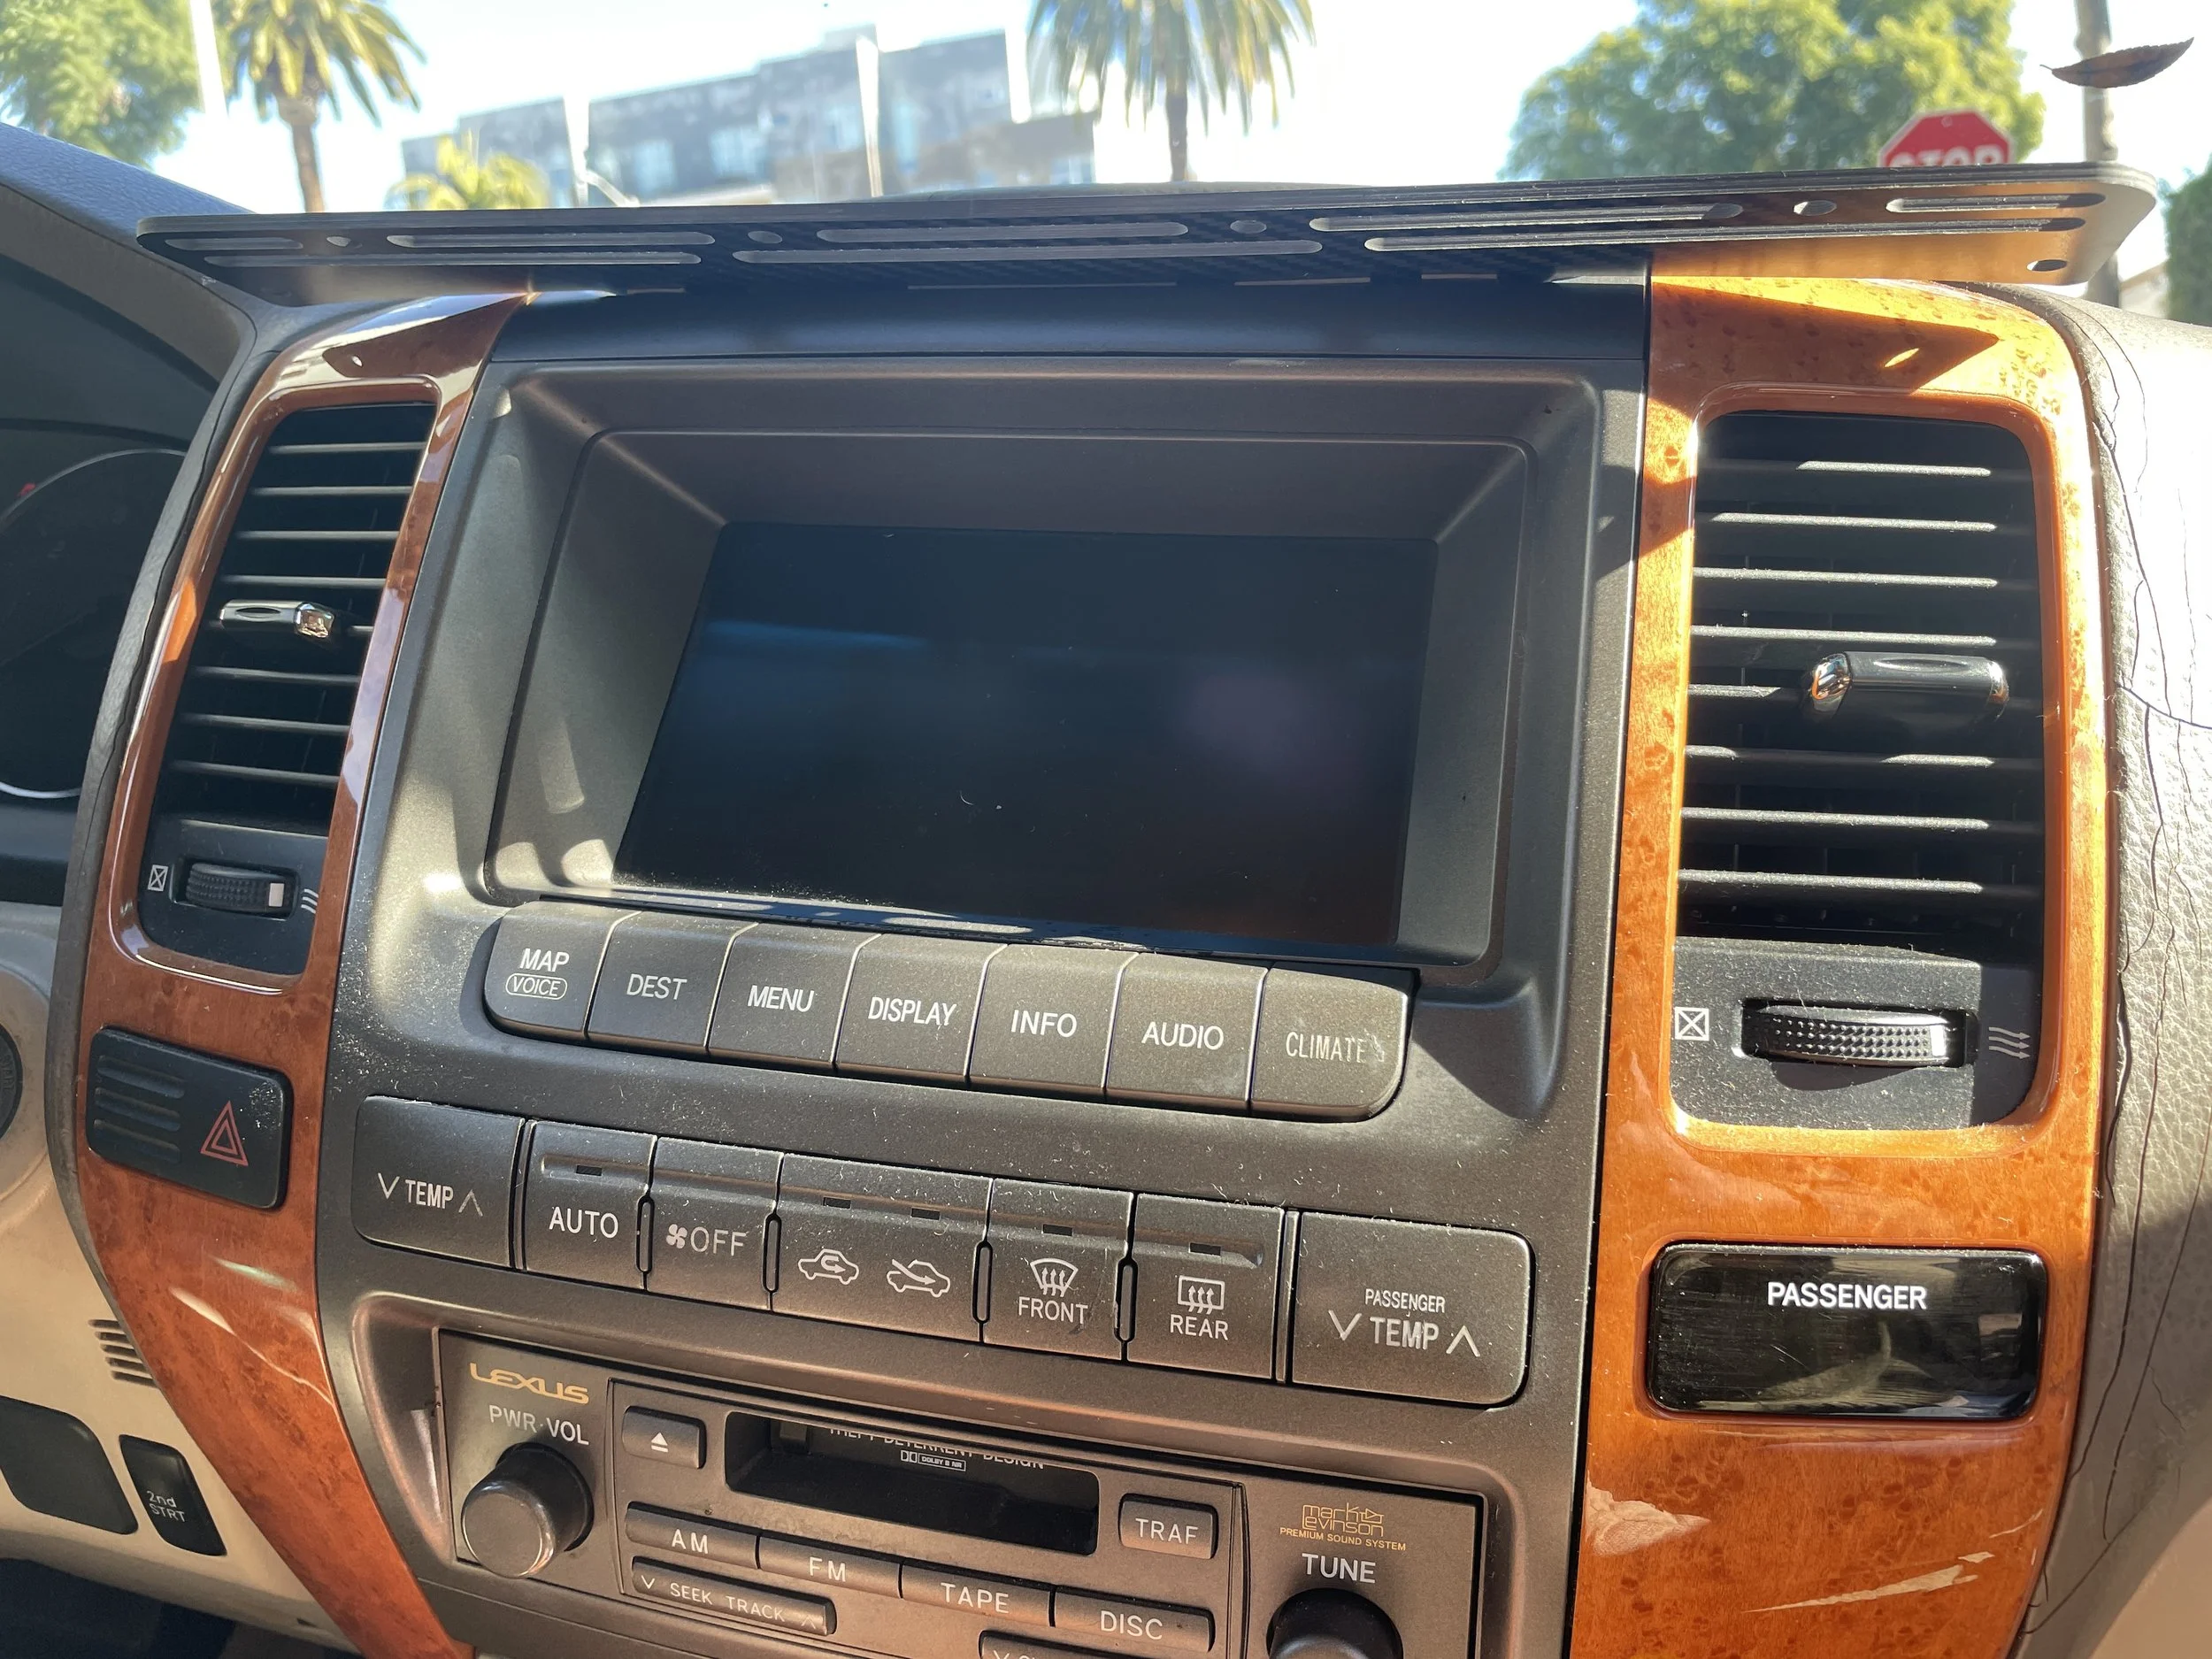
We originally considered two mounting locations; the first was low on the console in front of the transfer case shifter. After prototyping some potential solutions there, we still hadn’t come up with a design that really felt spot-on. So we shifted our attention to the upper console area above the nav screen. (Yes, we’re lucky enough to have to contend with a 16-year old nav screen 🙄. It’s on our to-do list.)
We were, admittedly, inspired by the location selected by the folks at ORS for their Modular Dash Panel, but there are a few details in their design that didn’t quite suit our needs. (As you’ll see in this article, our design is entirely our own and done completely in-house. After all, there are only so many locations to mount things in the vehicle.)
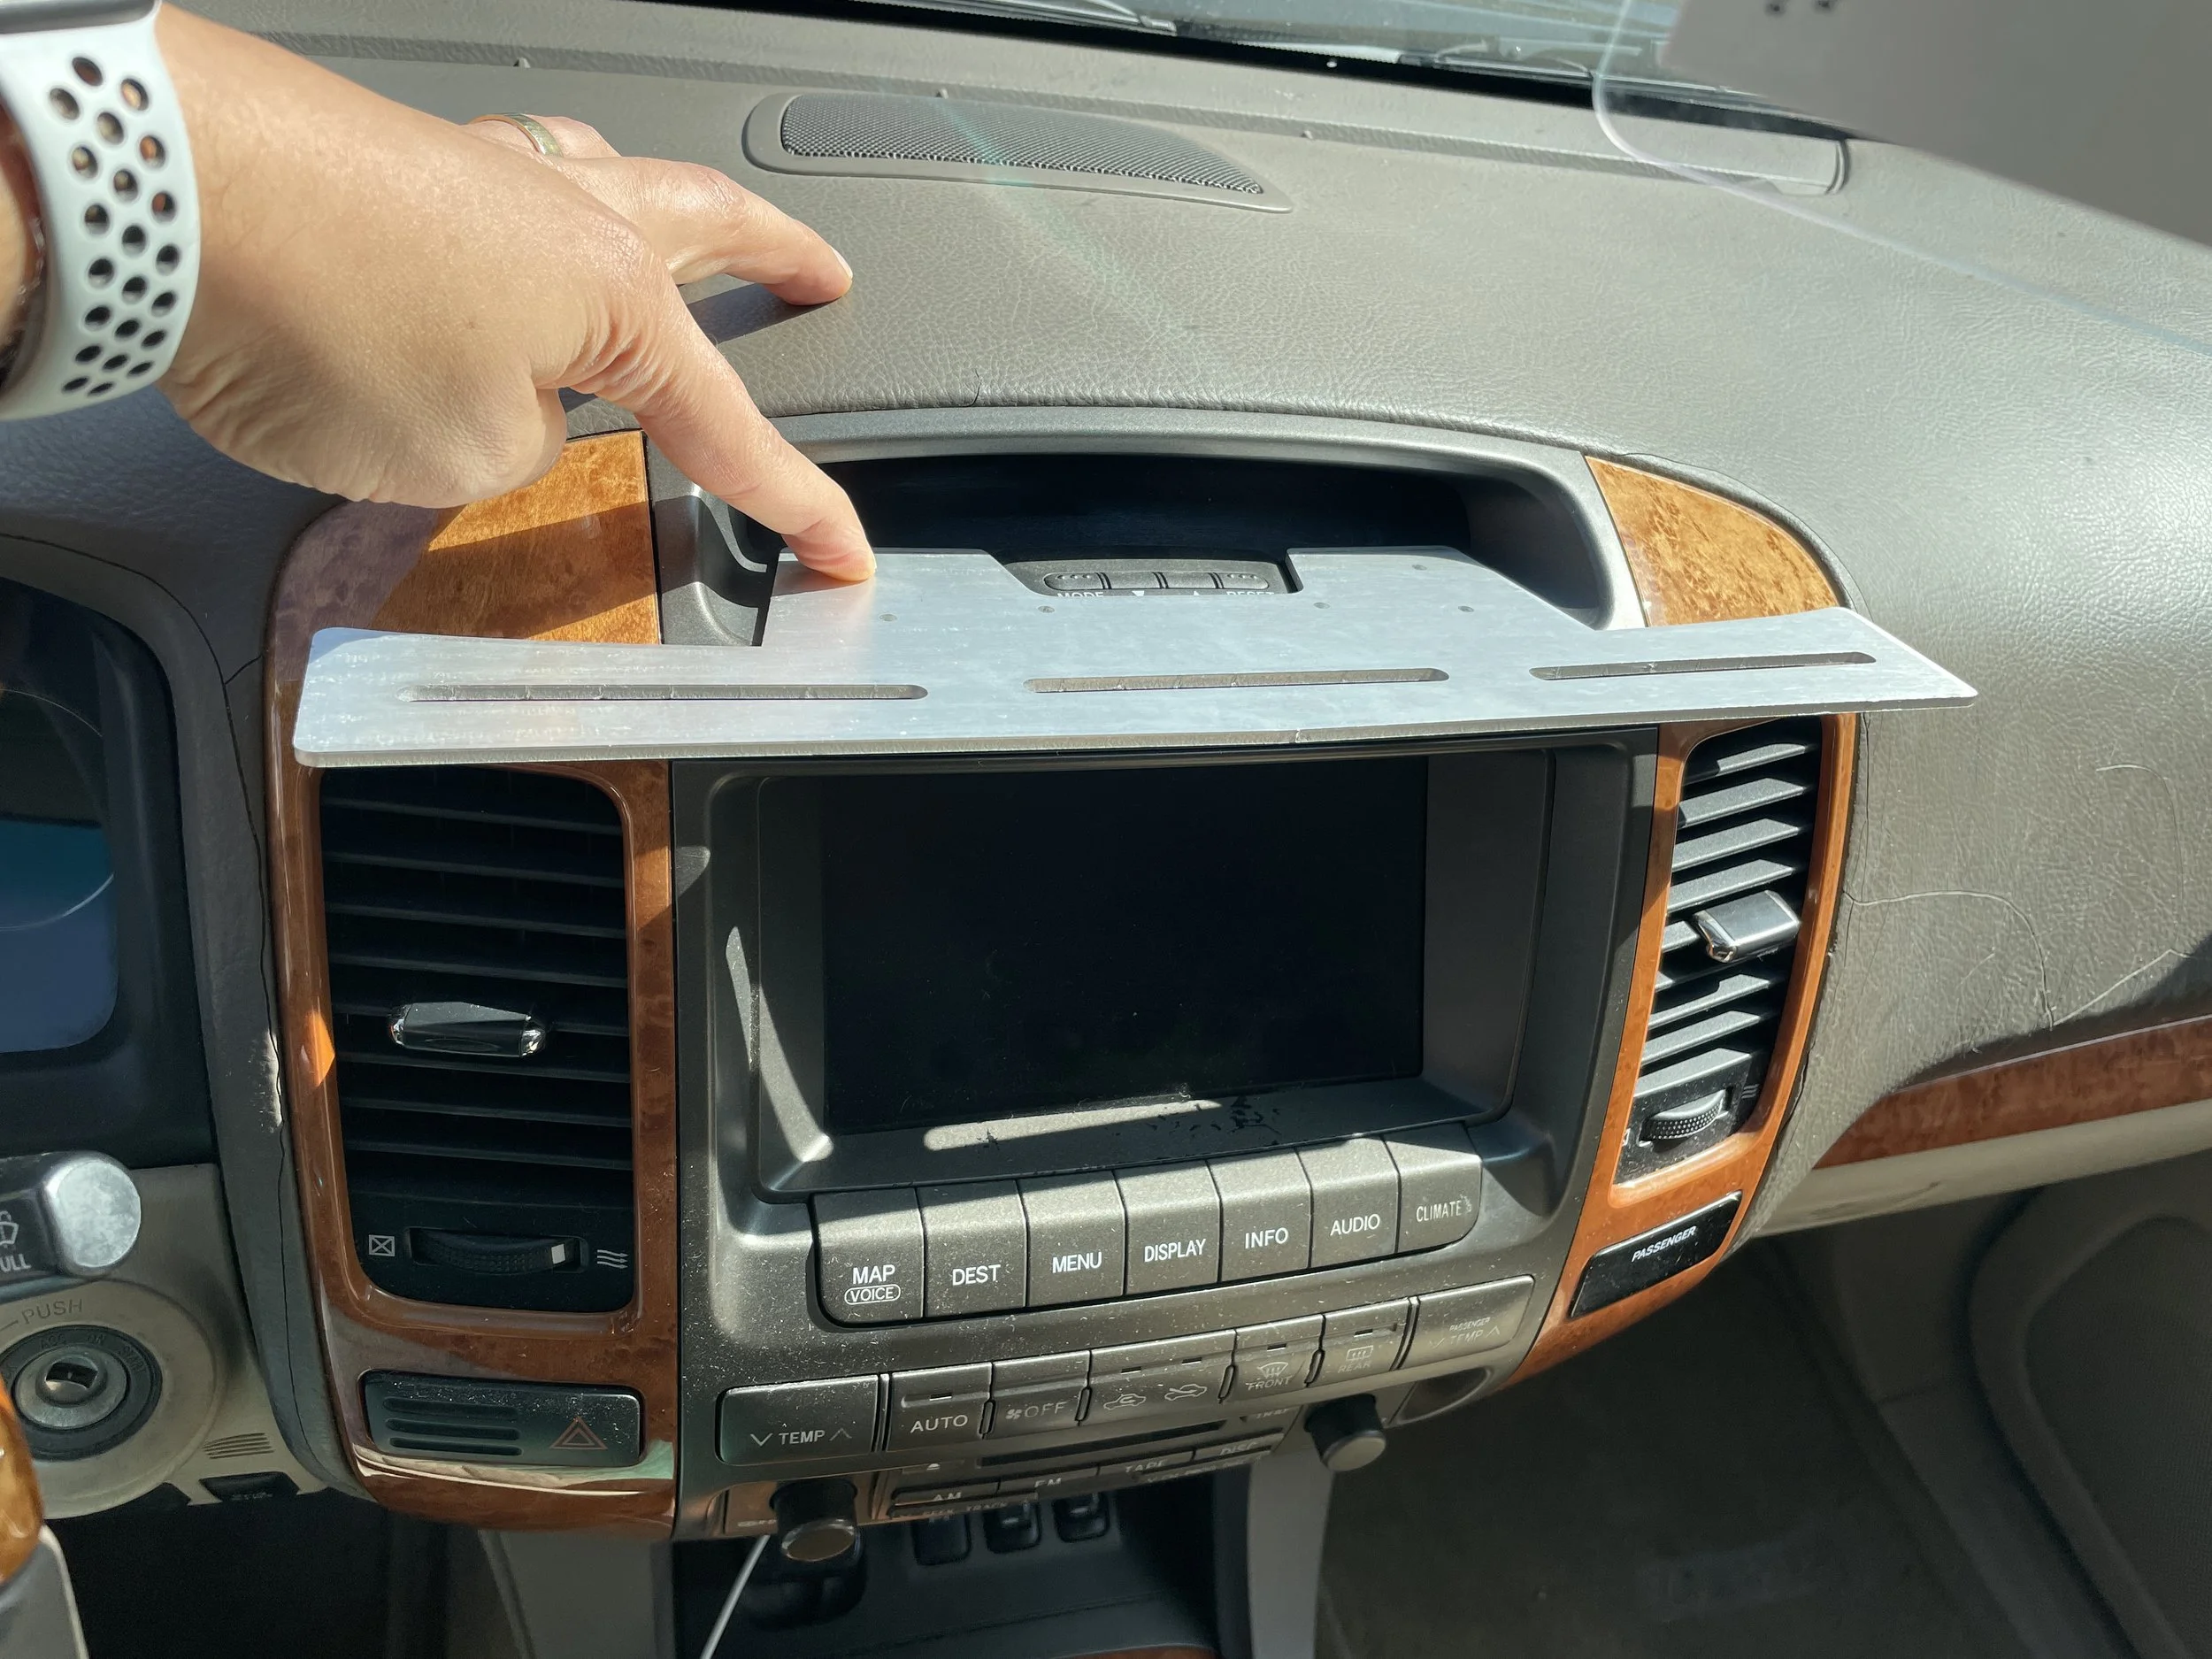
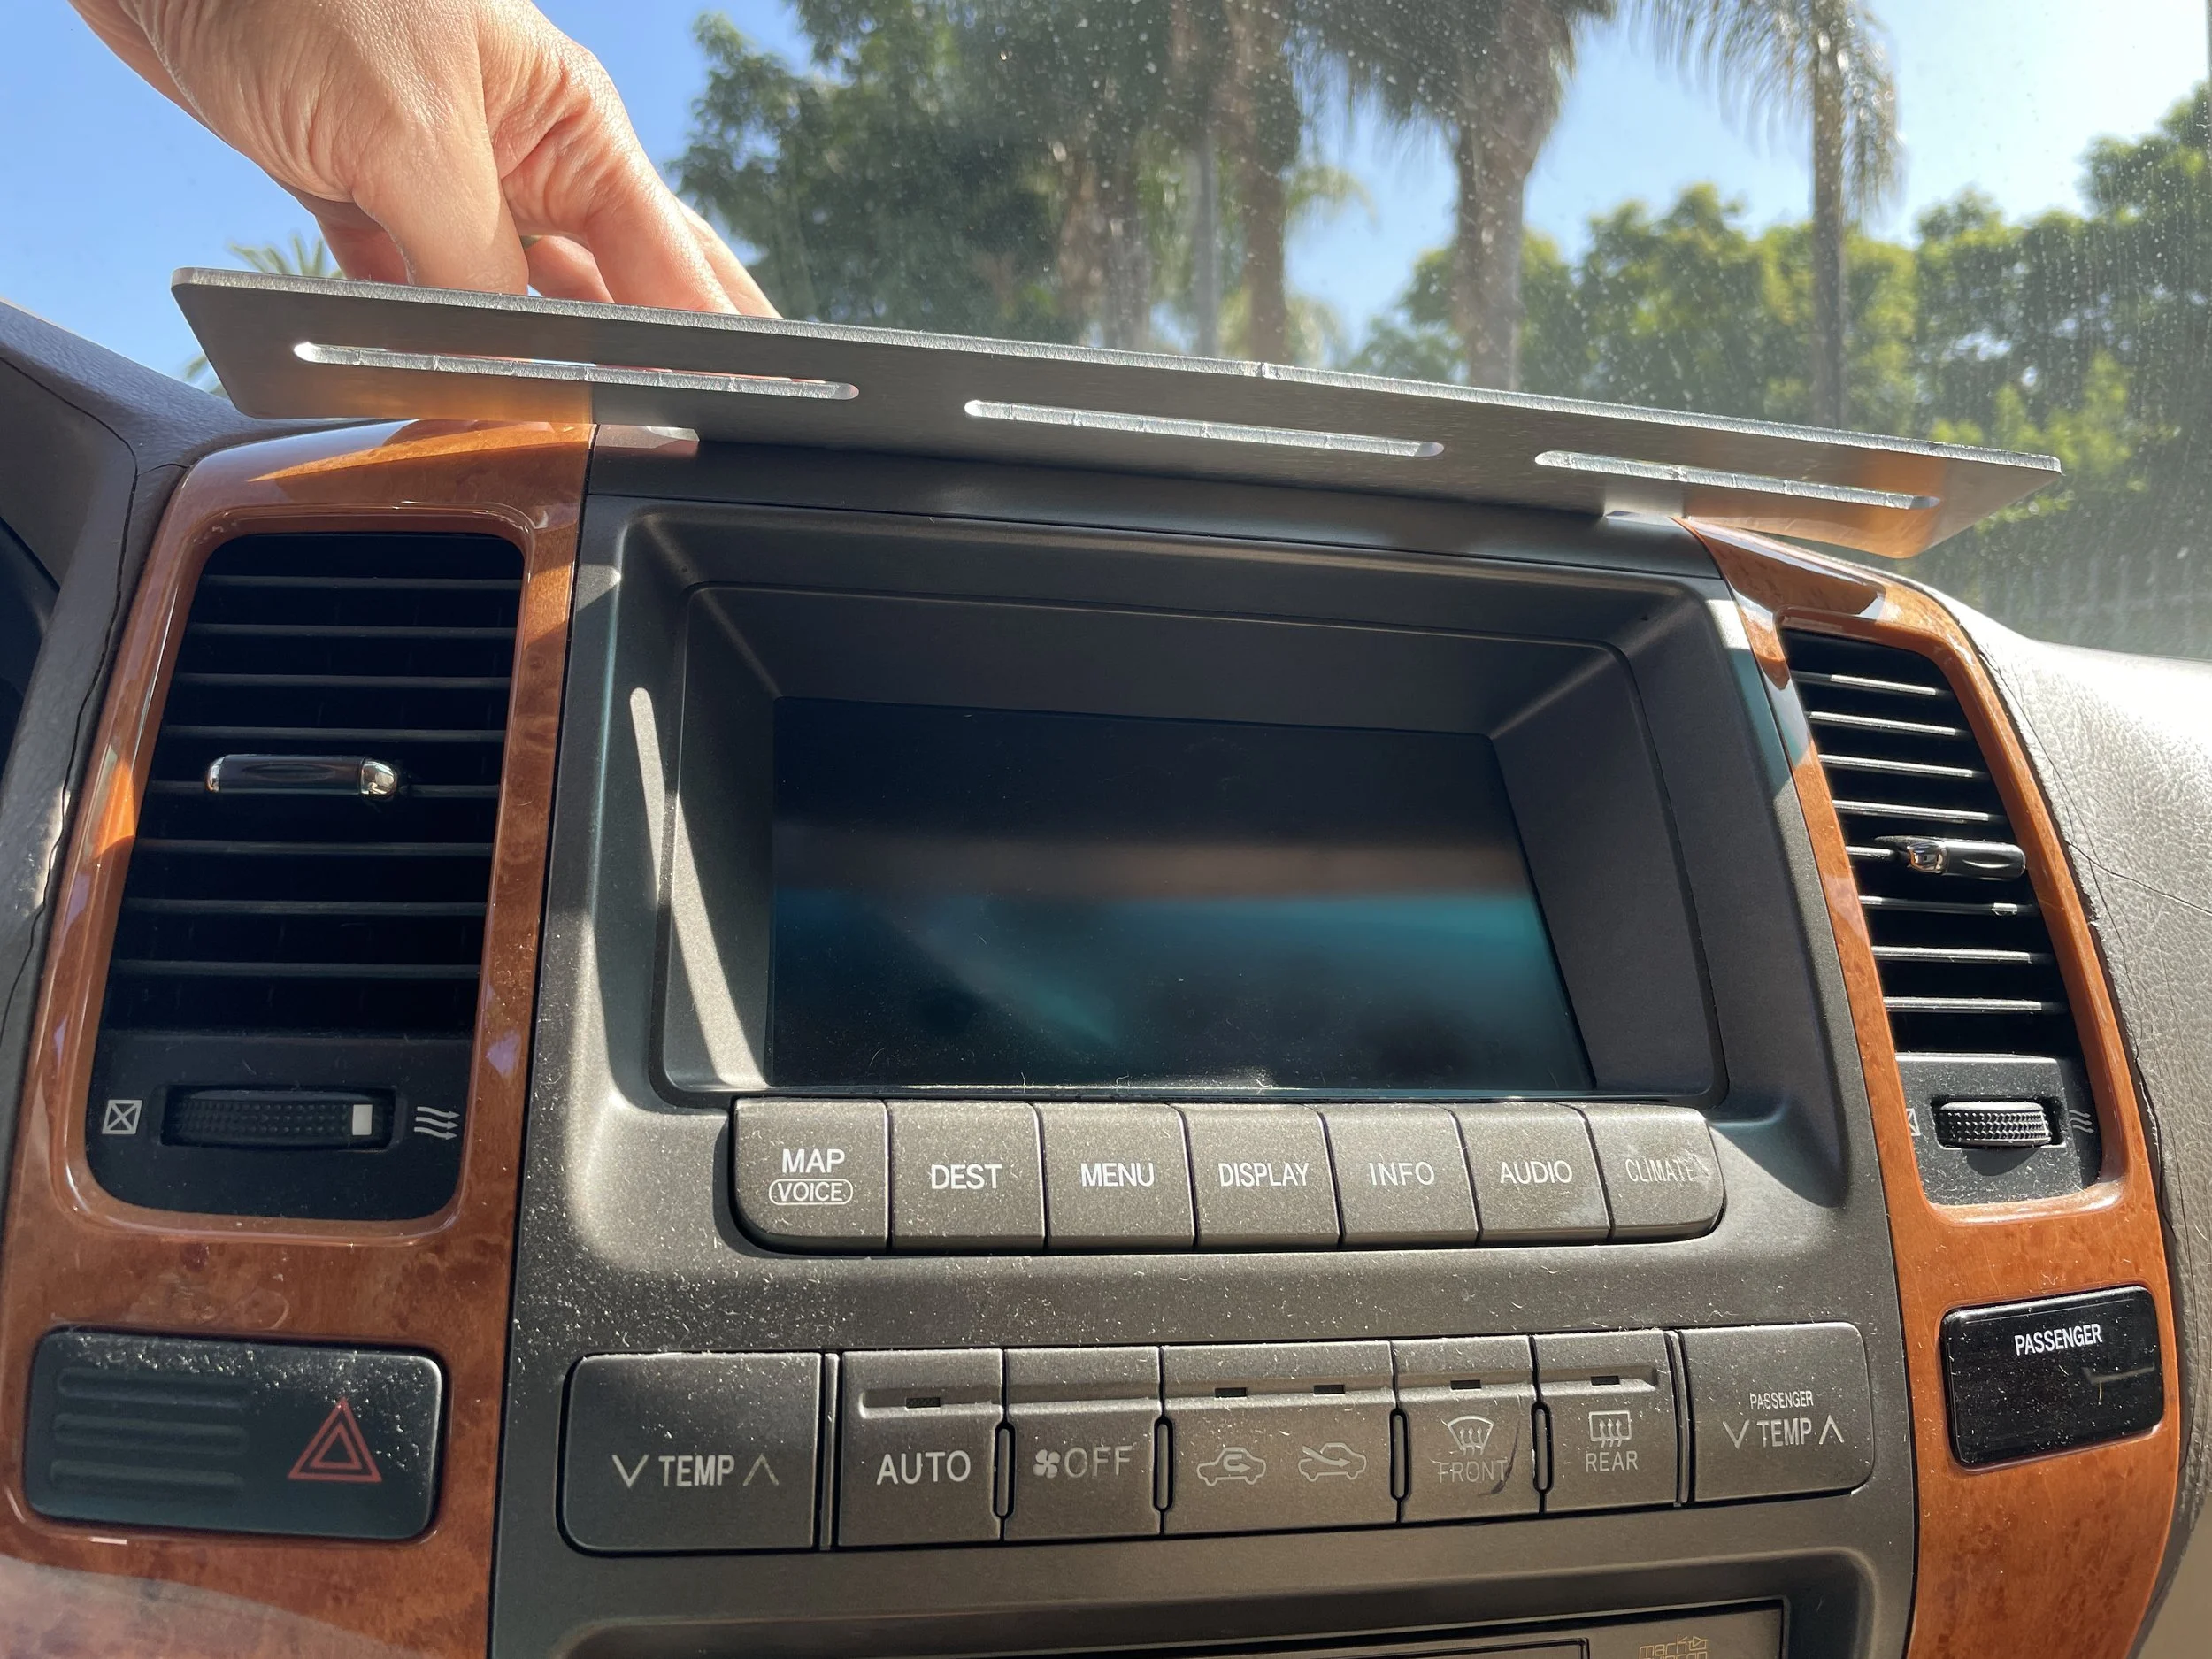
We started our process by acquiring a spare trim piece for the clock area so that we could take careful measurements and examine the mounting points.

From there, we began prototyping on paper to get a sense of what might work best. These paper prototypes are a fast, cheap, effective way to test out our designs before moving on to other materials.
Our original design idea was to create a plate that would allow us to mount a length of aluminum extrusion to the area. The extrusion offers the advantage of creating multiple mounting points on three sides. However, just to be safe, we also mocked up some options that remove the extrusion rail.
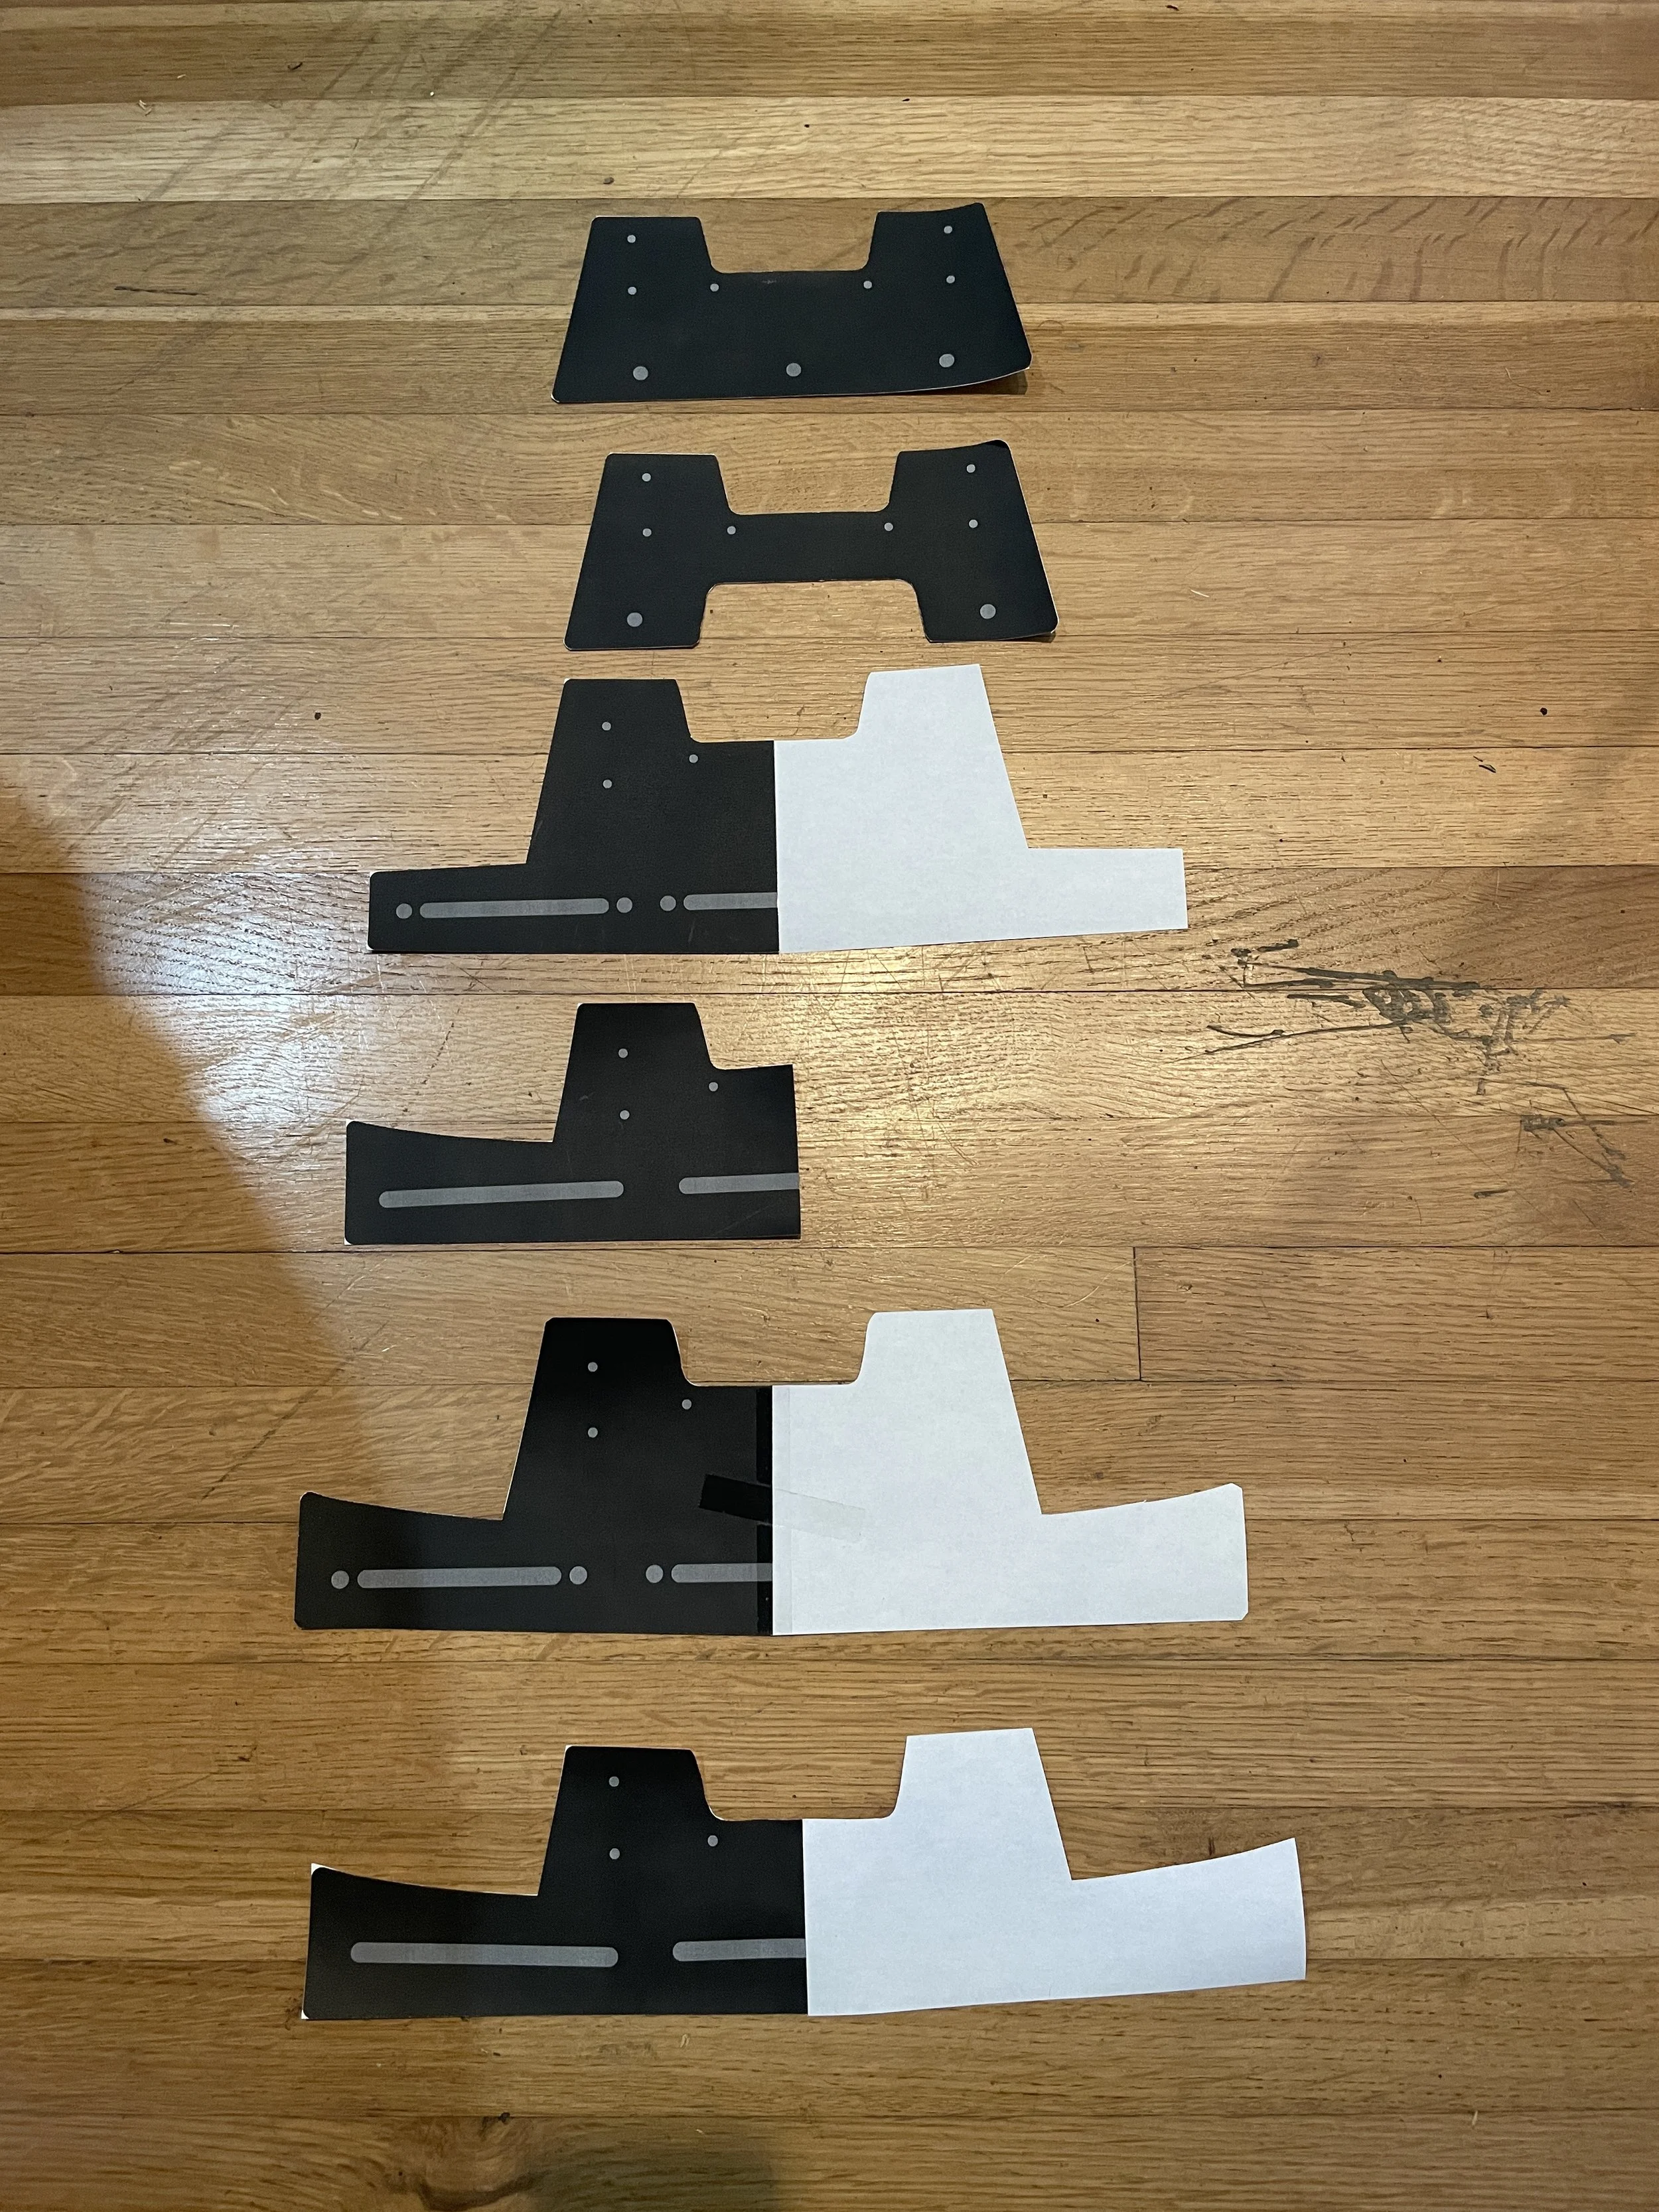
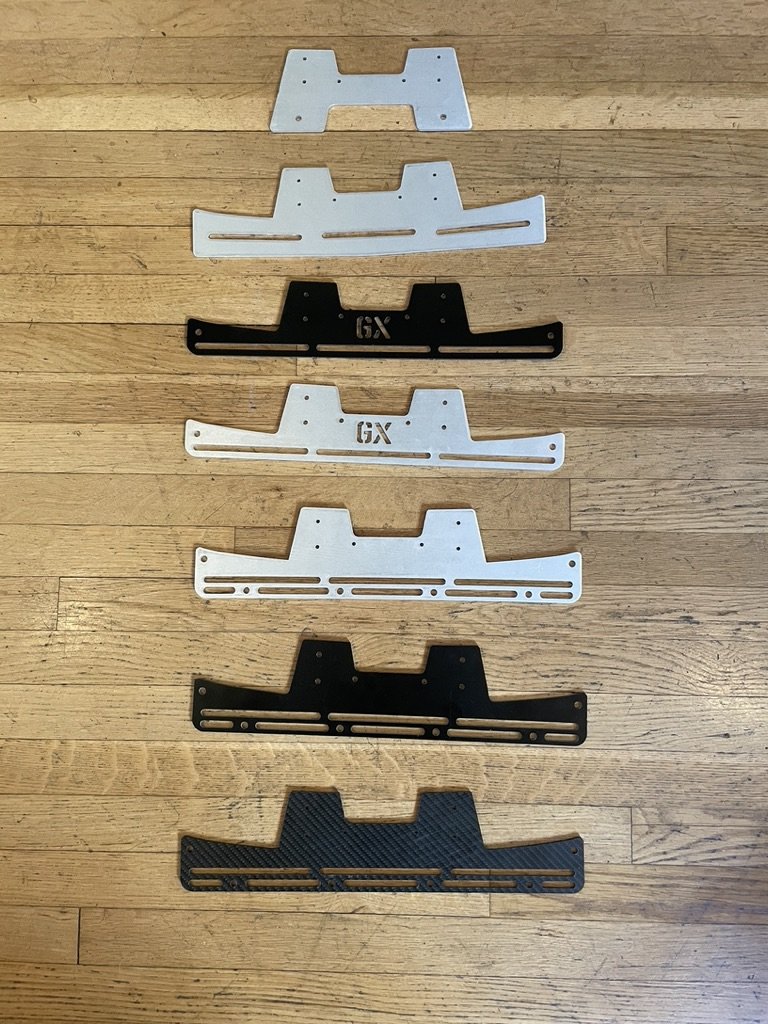
Once we’d narrowed down to a couple of options that seemed workable, we sent the files off to get aluminum prototypes cut. Upon receipt, we put together the extrusion panel to get a sense of how it might work. While it does offer a multitude of mounting options, the extrusion rail is heavier than one might expect. Given that the plate mounts to the relatively thin plastic bezel of the clock trim, we decided that it isn’t the best solution due to the weight.

With that in mind, we’ve shifted our attention (though we have not given up on it entirely) from the extrusion solution to a simple plate design. This design is a step in the right direction. however we found that it sticks out too far for our liking.


For the next iteration, we’ve shortened the distance from the mounting points to the edge closest to the driver and rounded the corners more to smooth it out. We’ve also prototyped the design in both thinner aluminum as well as ACM (heavy-duty plastic sandwiched between aluminum sheets).

This round of prototypes turned out to be largely a failure. The thinner aluminum and the ACM composite are both not stiff enough for our liking. We’re worried about vibration transferring to the comms rail and making devices difficult to use. We also realized that, while beautifully streamlined, this design would allow popular mounting bases (like a Ram Mounts diamond base) to stick out beyond the front edge of the rail. Not a huge deal, but not the level of detail we like to release into the world.
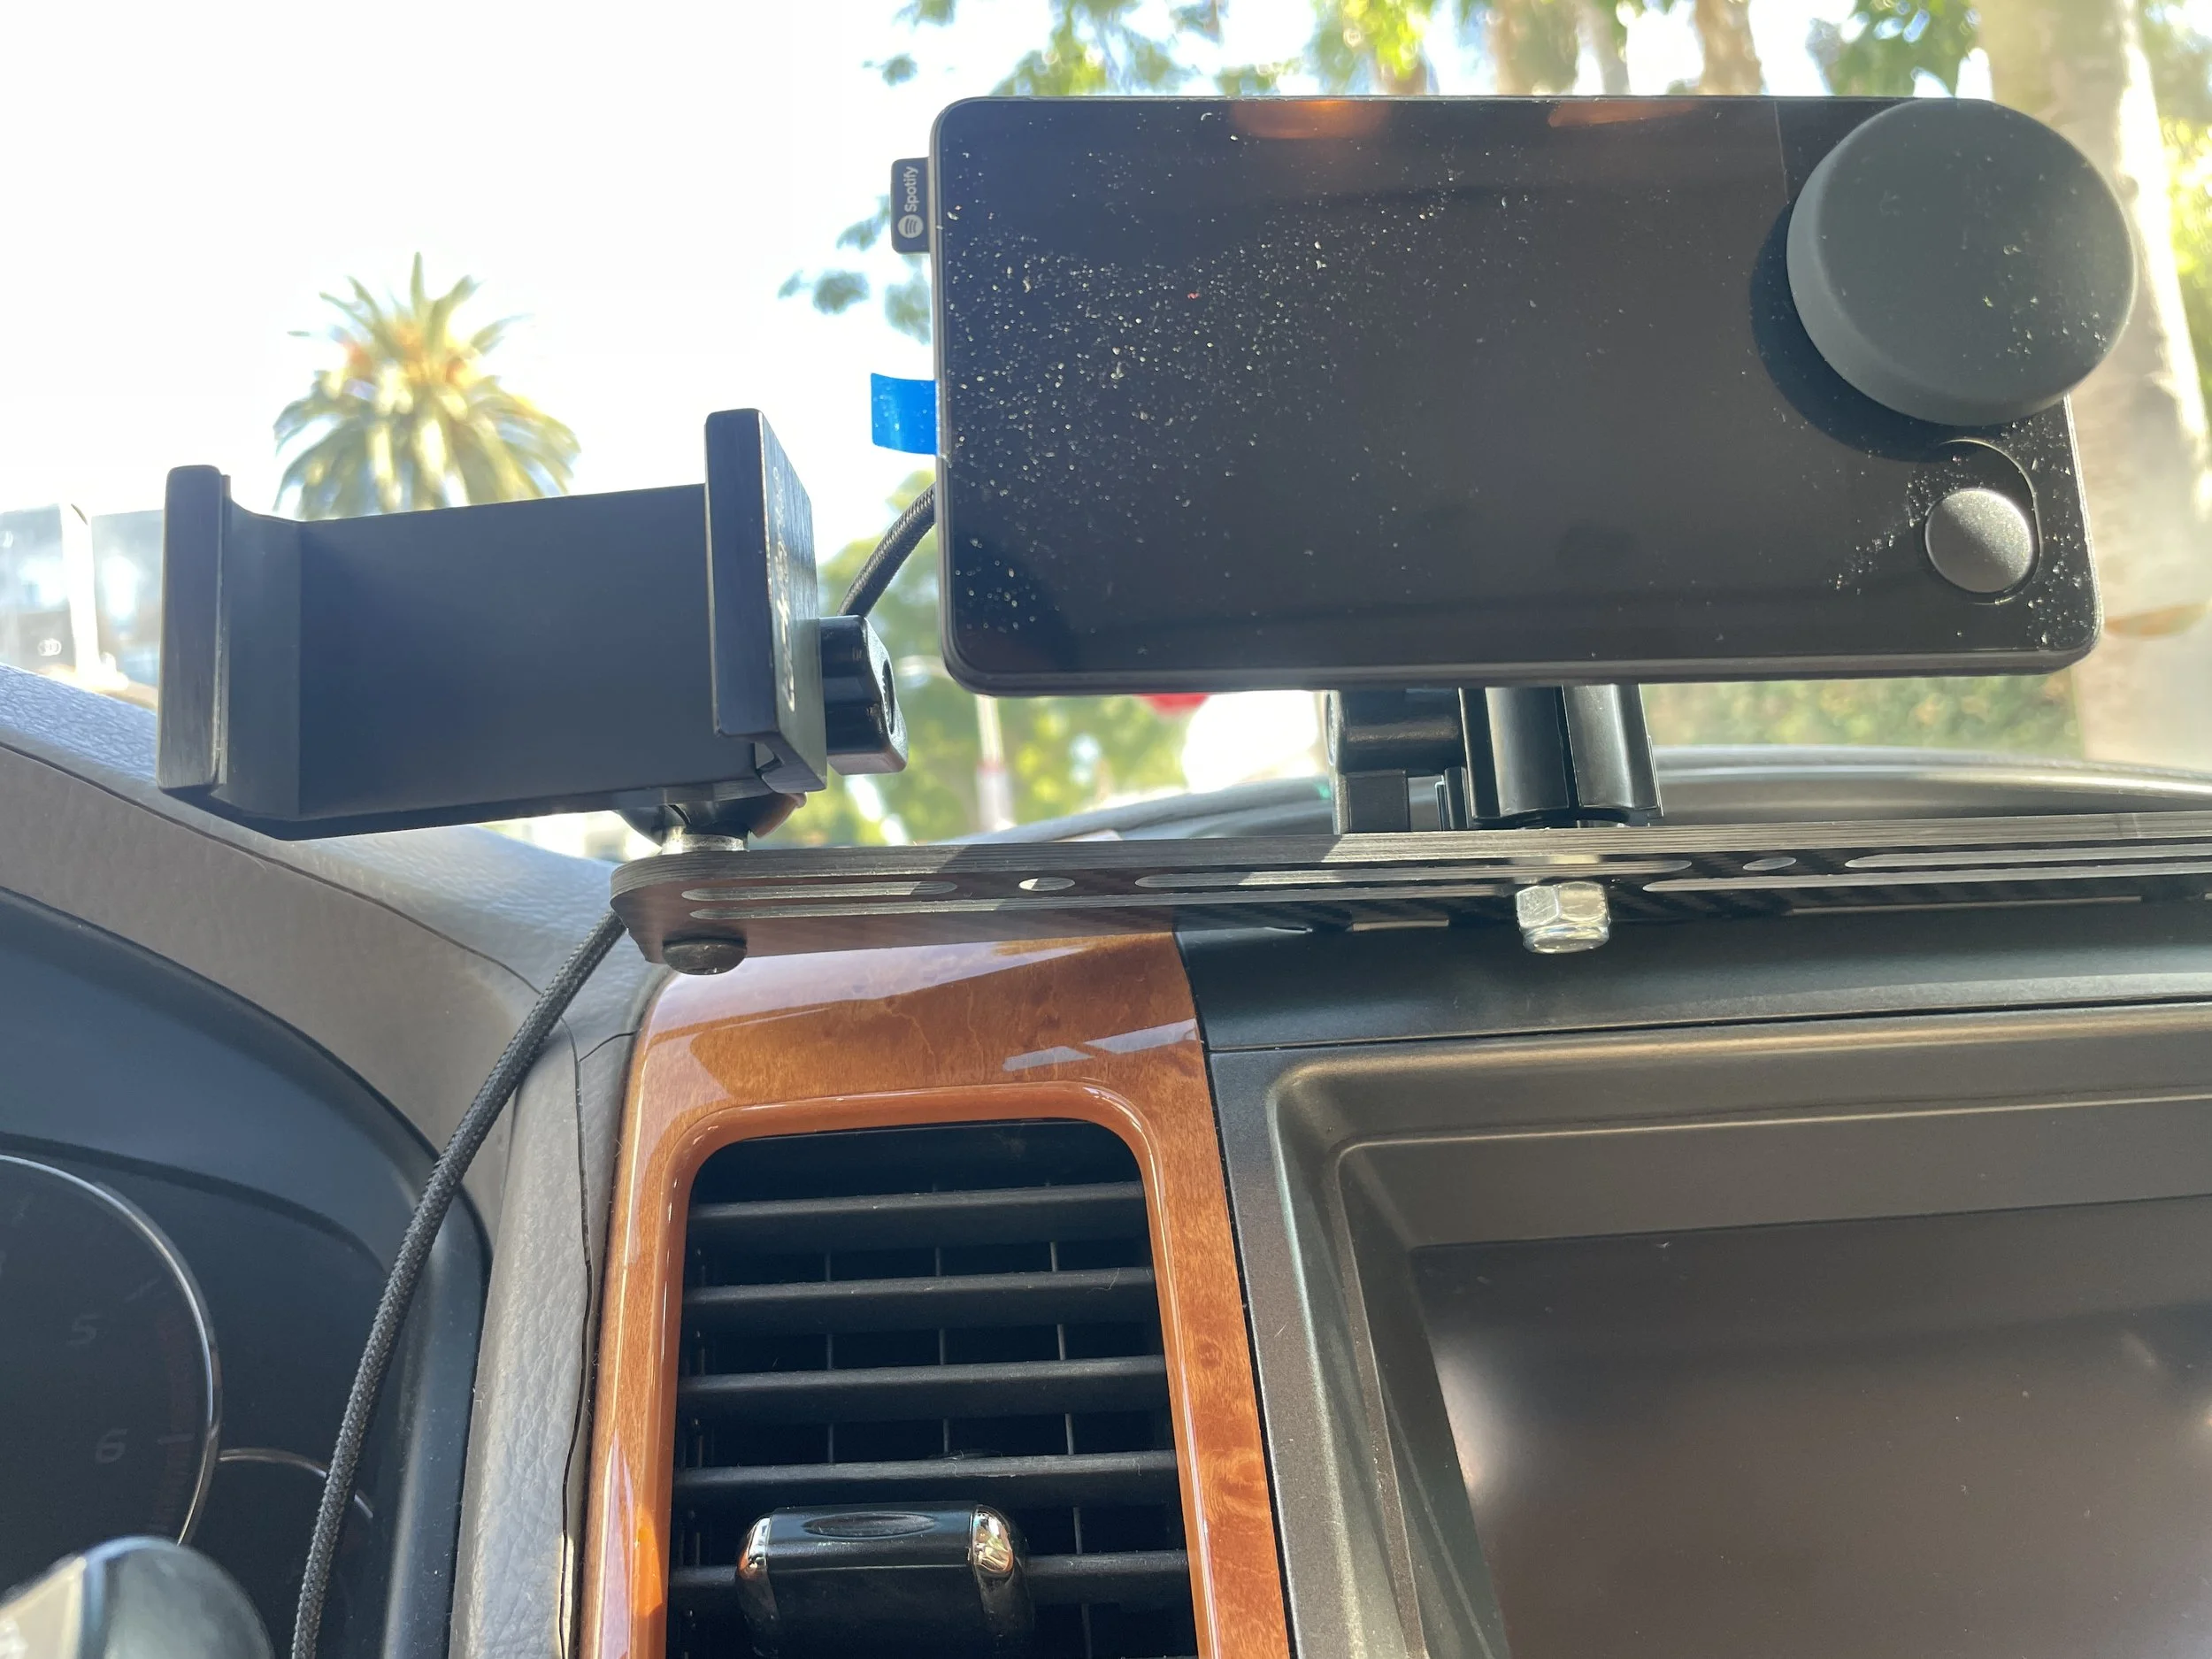
With that in mind, we went back to the drawing board to create a new rail design offering more mounting points, including options for bigger bases that won’t hang over the edge. This is the resulting design and has turned into our final product.

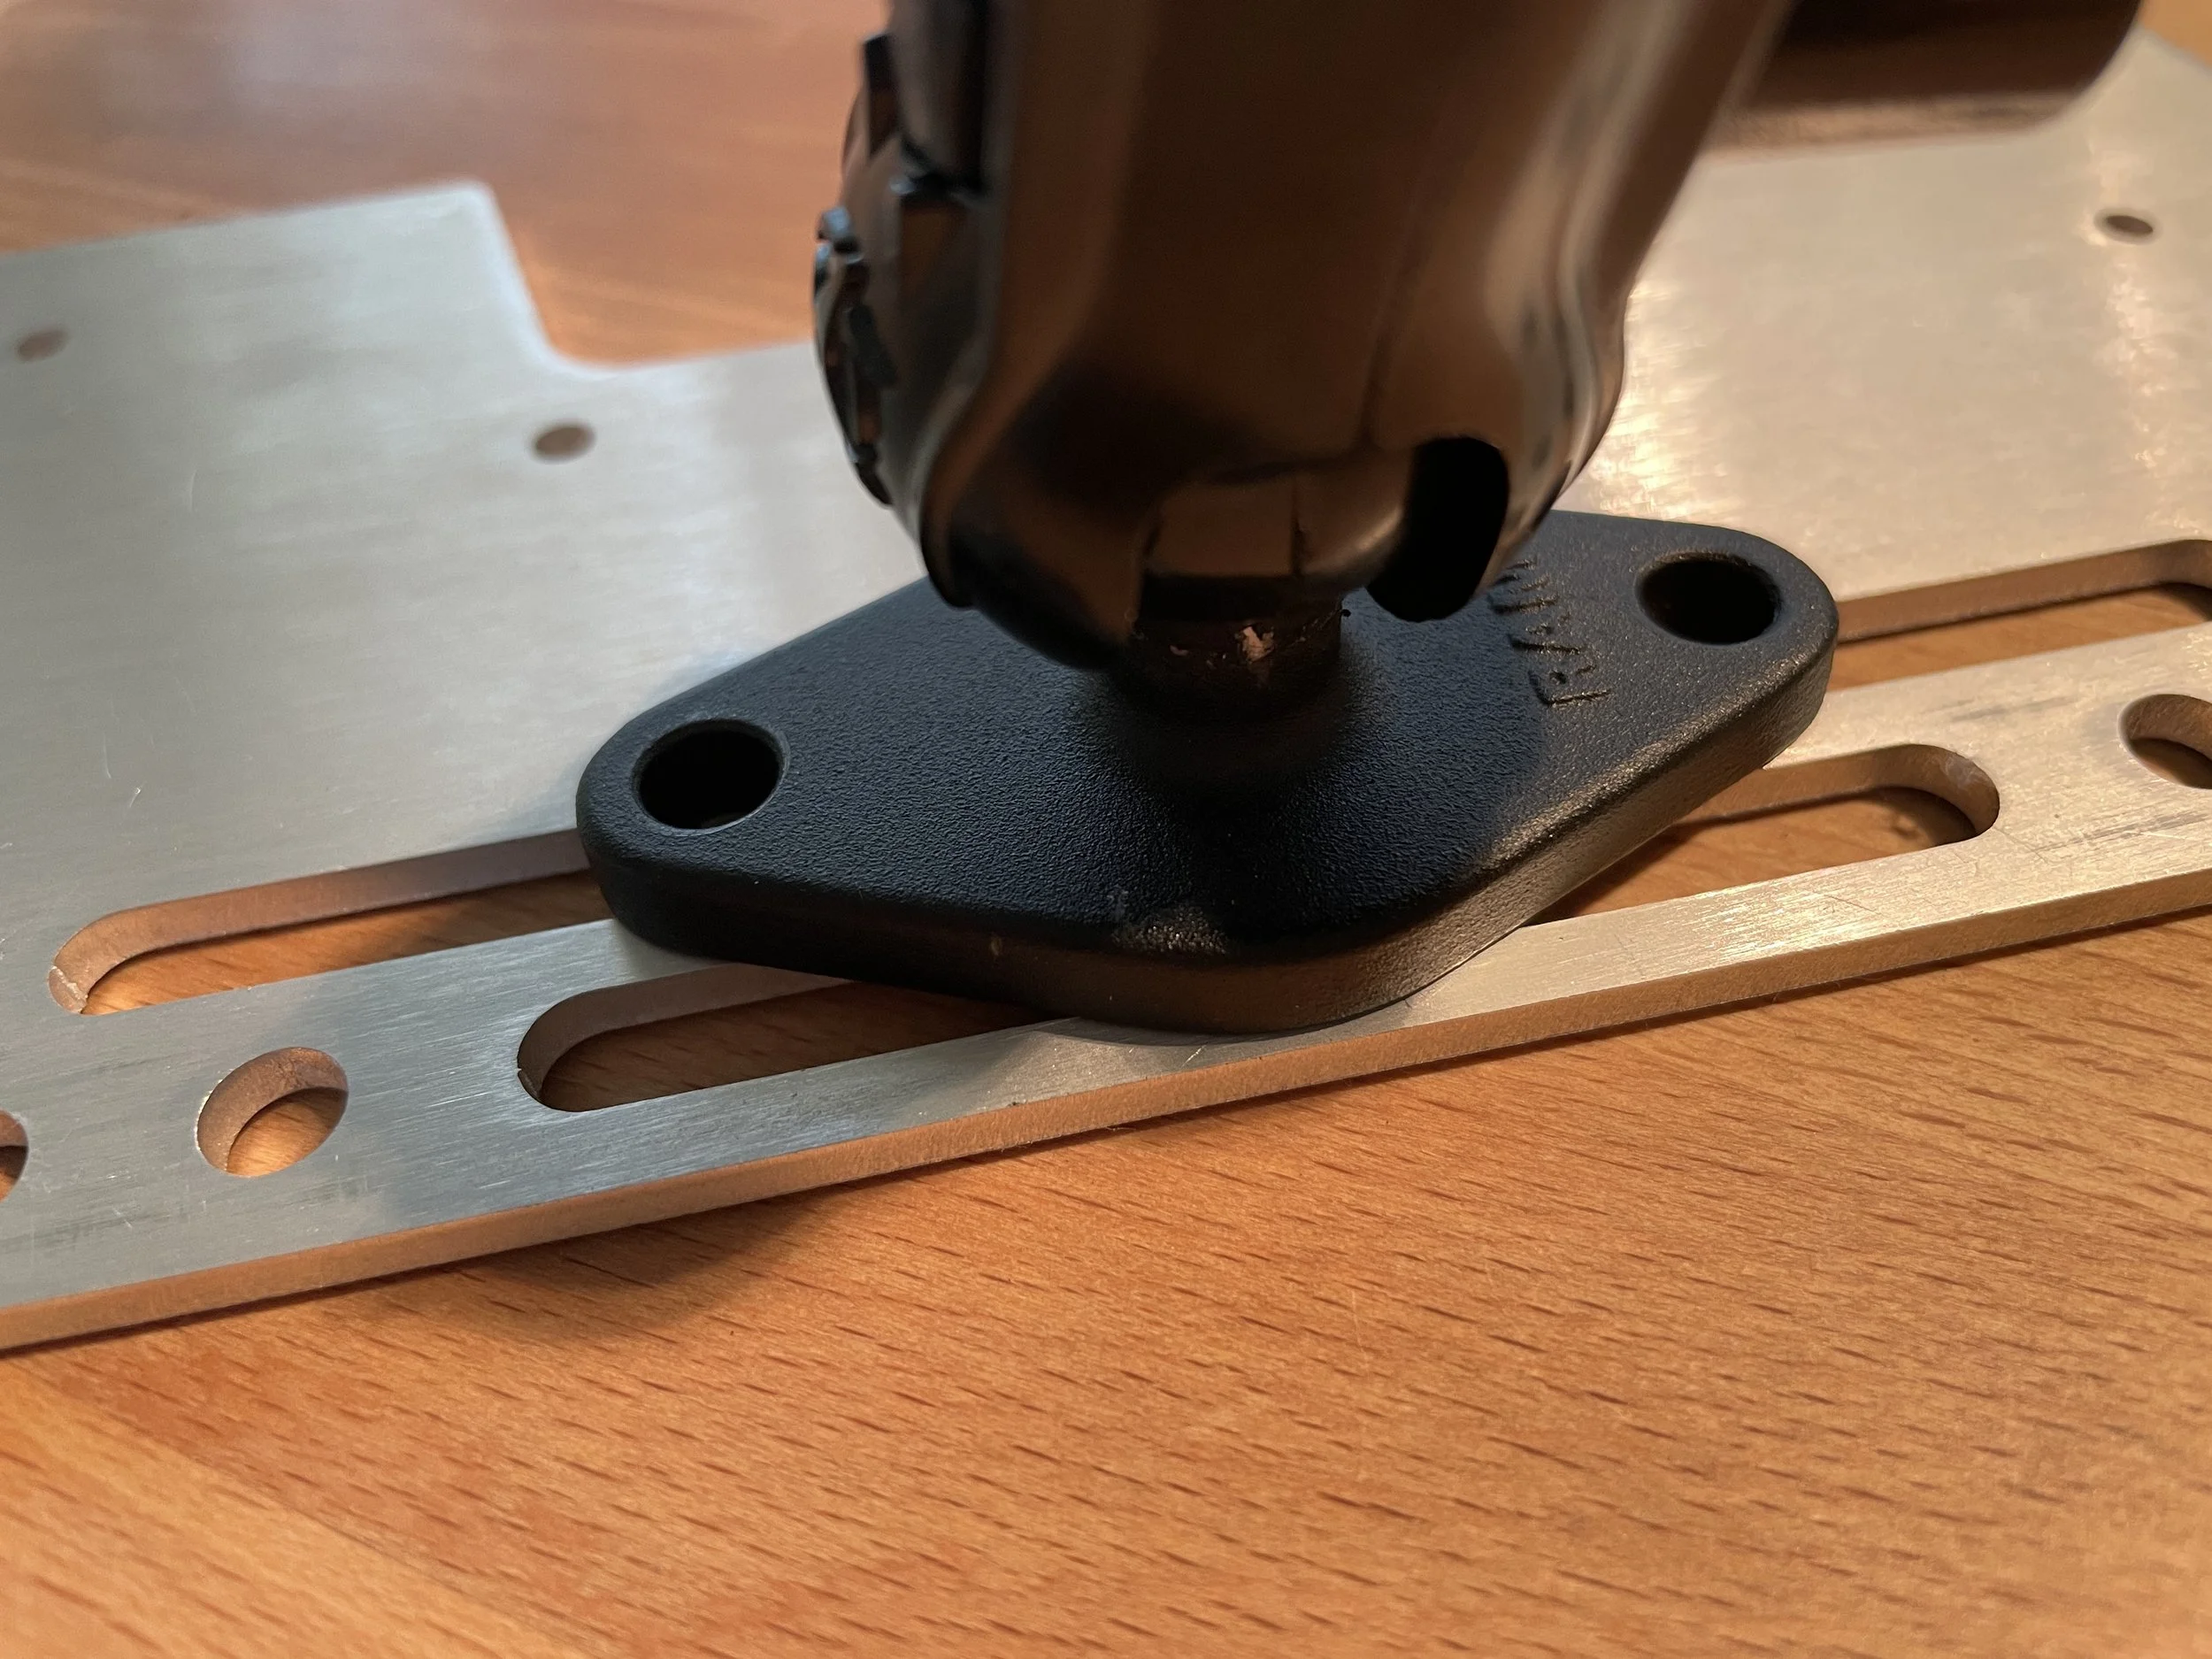
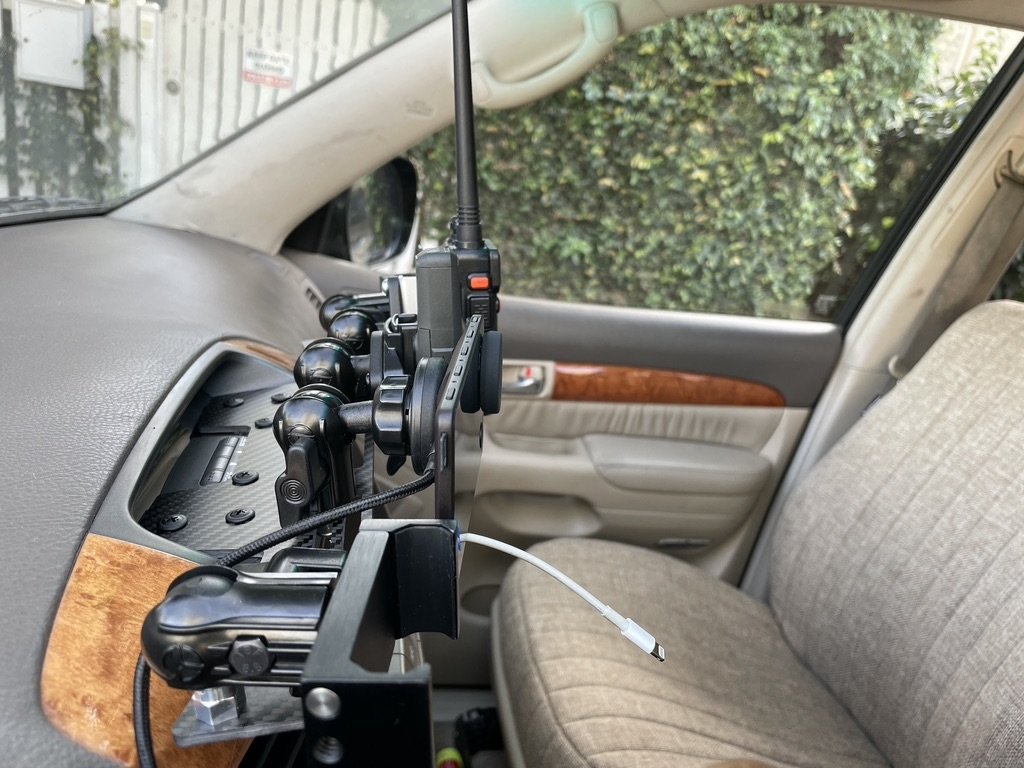
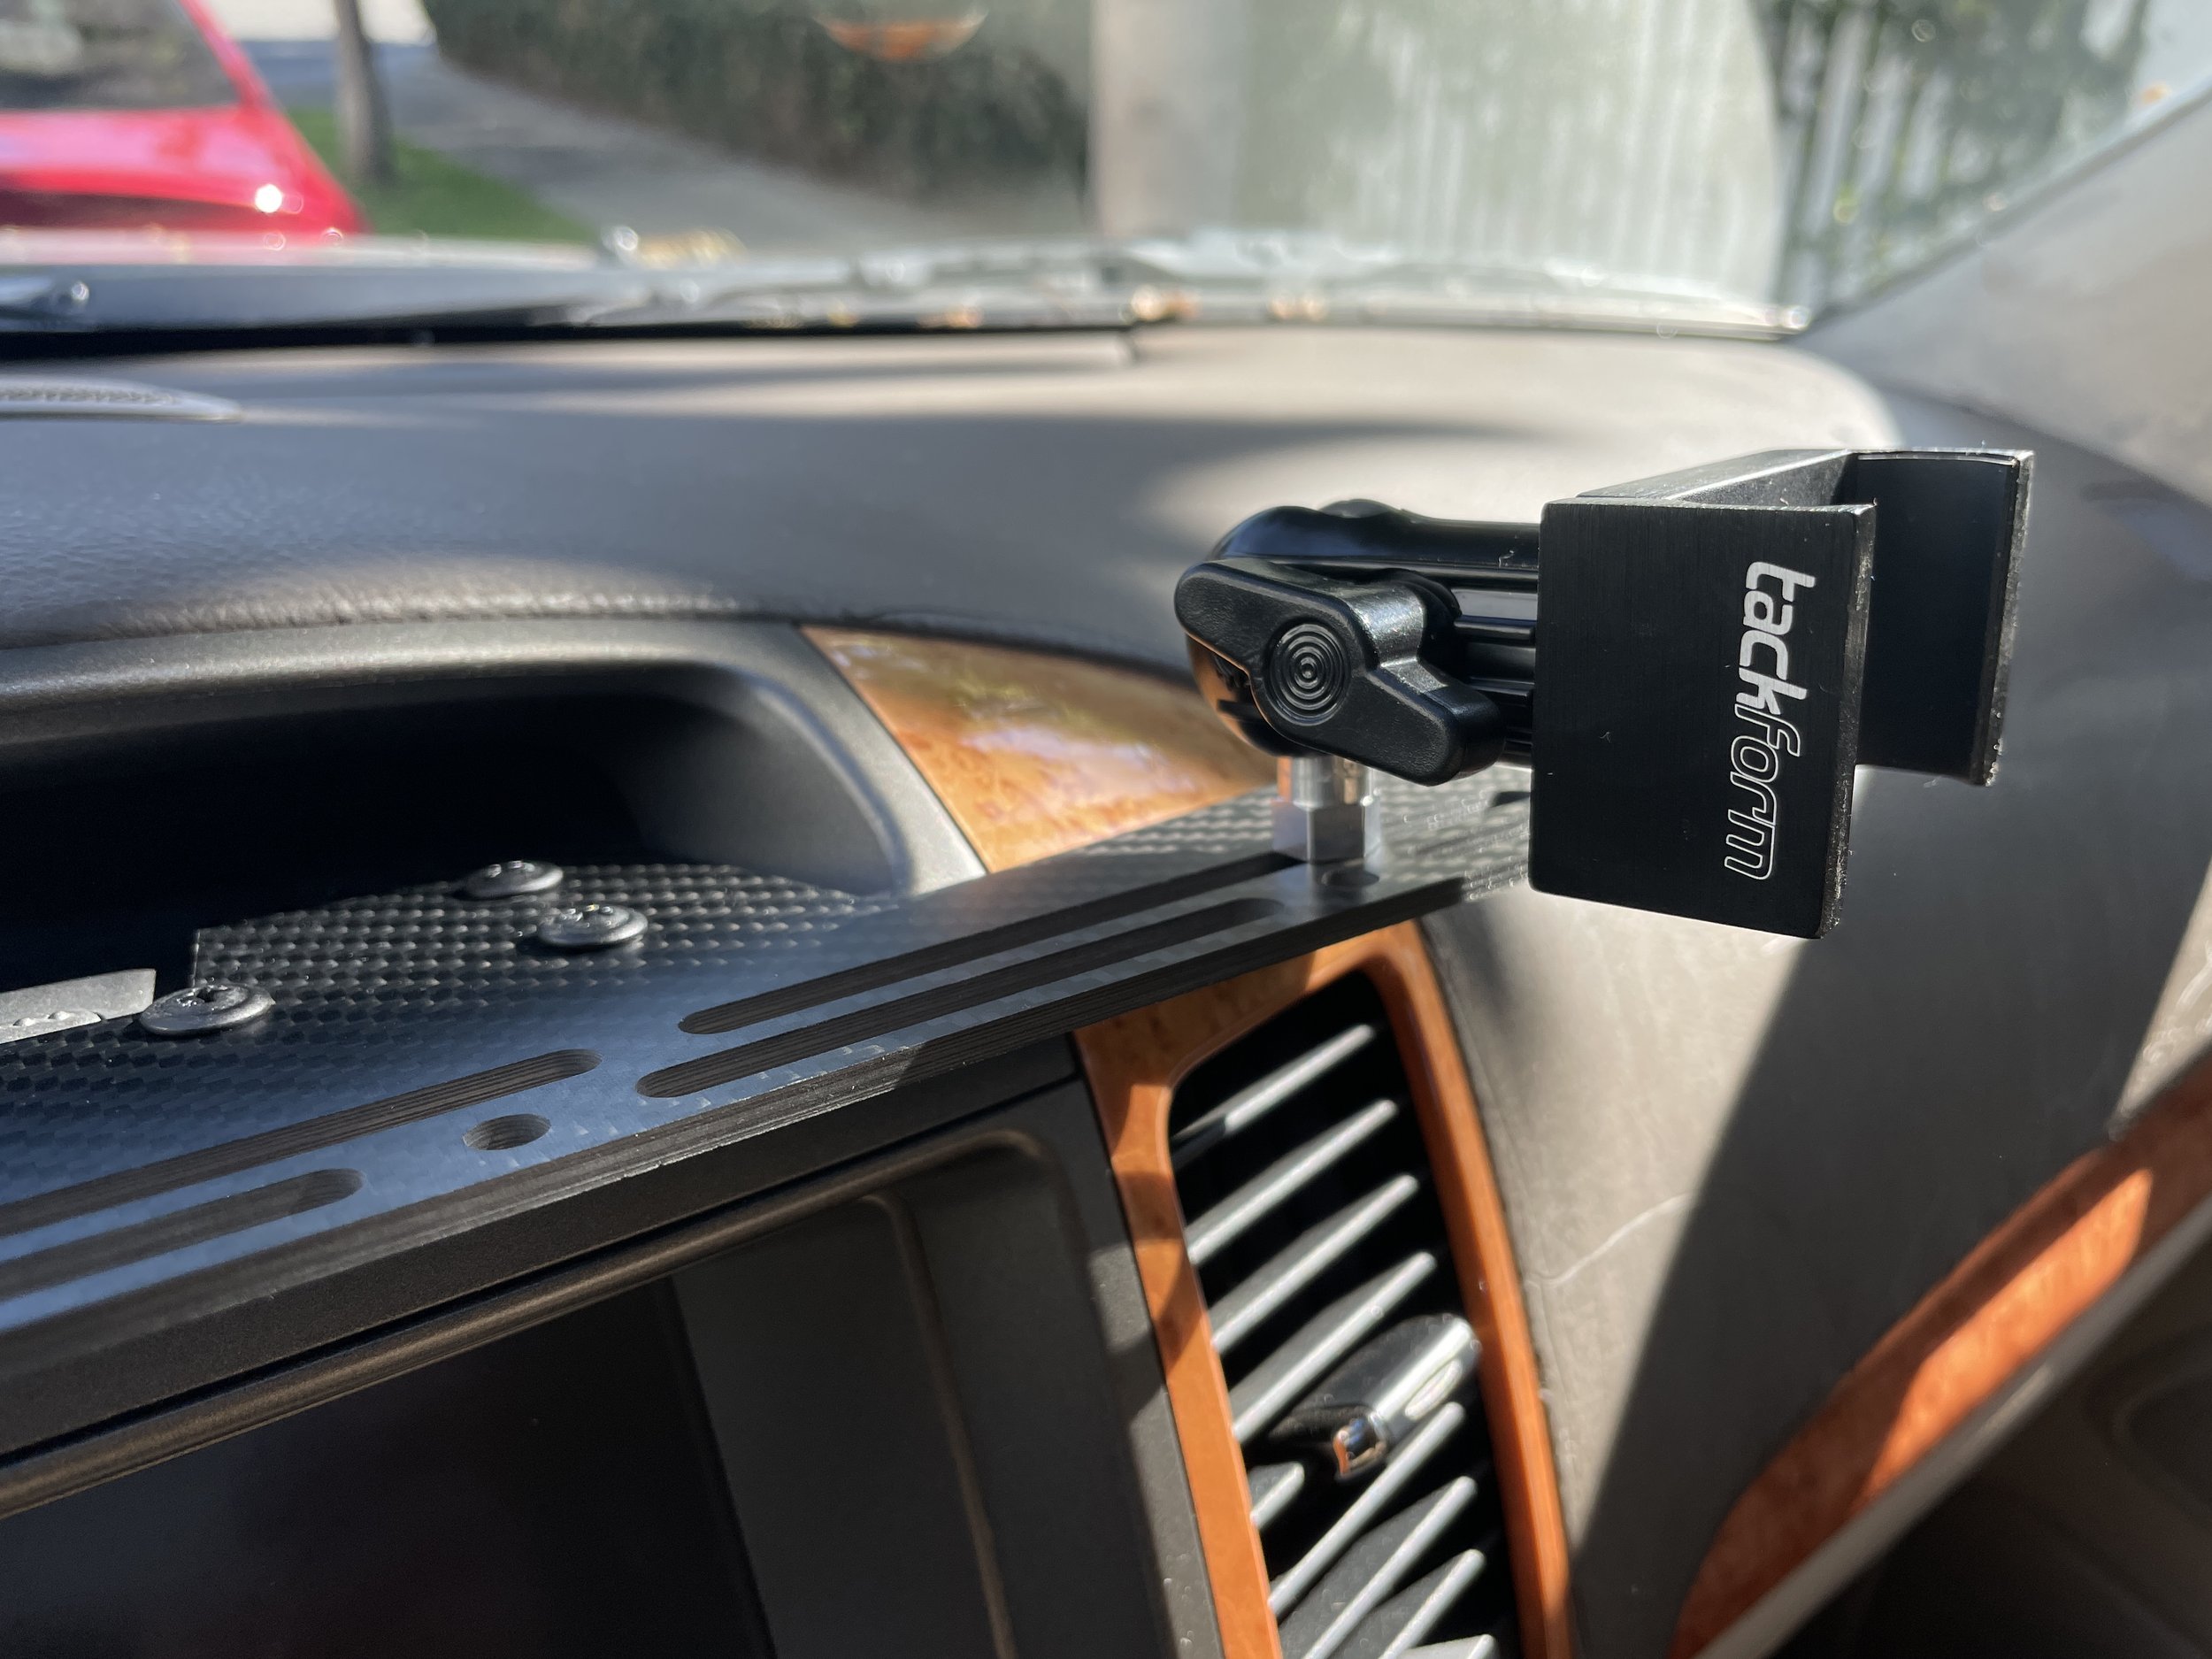
In eighth inch aluminum, this version of the comms rail offers multiple mounting options on both top and bottom in a design that contours to fit in line with the wood trim above the air vents. This gives you the flexibility to mount devices to either side of the main screens (nav and clock) for both the driver and passenger. If you’re not worried about blocking screen real estate, then the comms rail is even more flexible in potential mounting options. Once satisfied, we also ordered a version in carbon fiber and fiberglass. Turns out, the fiberglass version is more flexible than expected and will not be part of our line-up. The carbon fiber version, however, is utterly drool-worthy.

In total, we created seven different prototypes to get this design to a point that makes us happy. Here’s the progression:
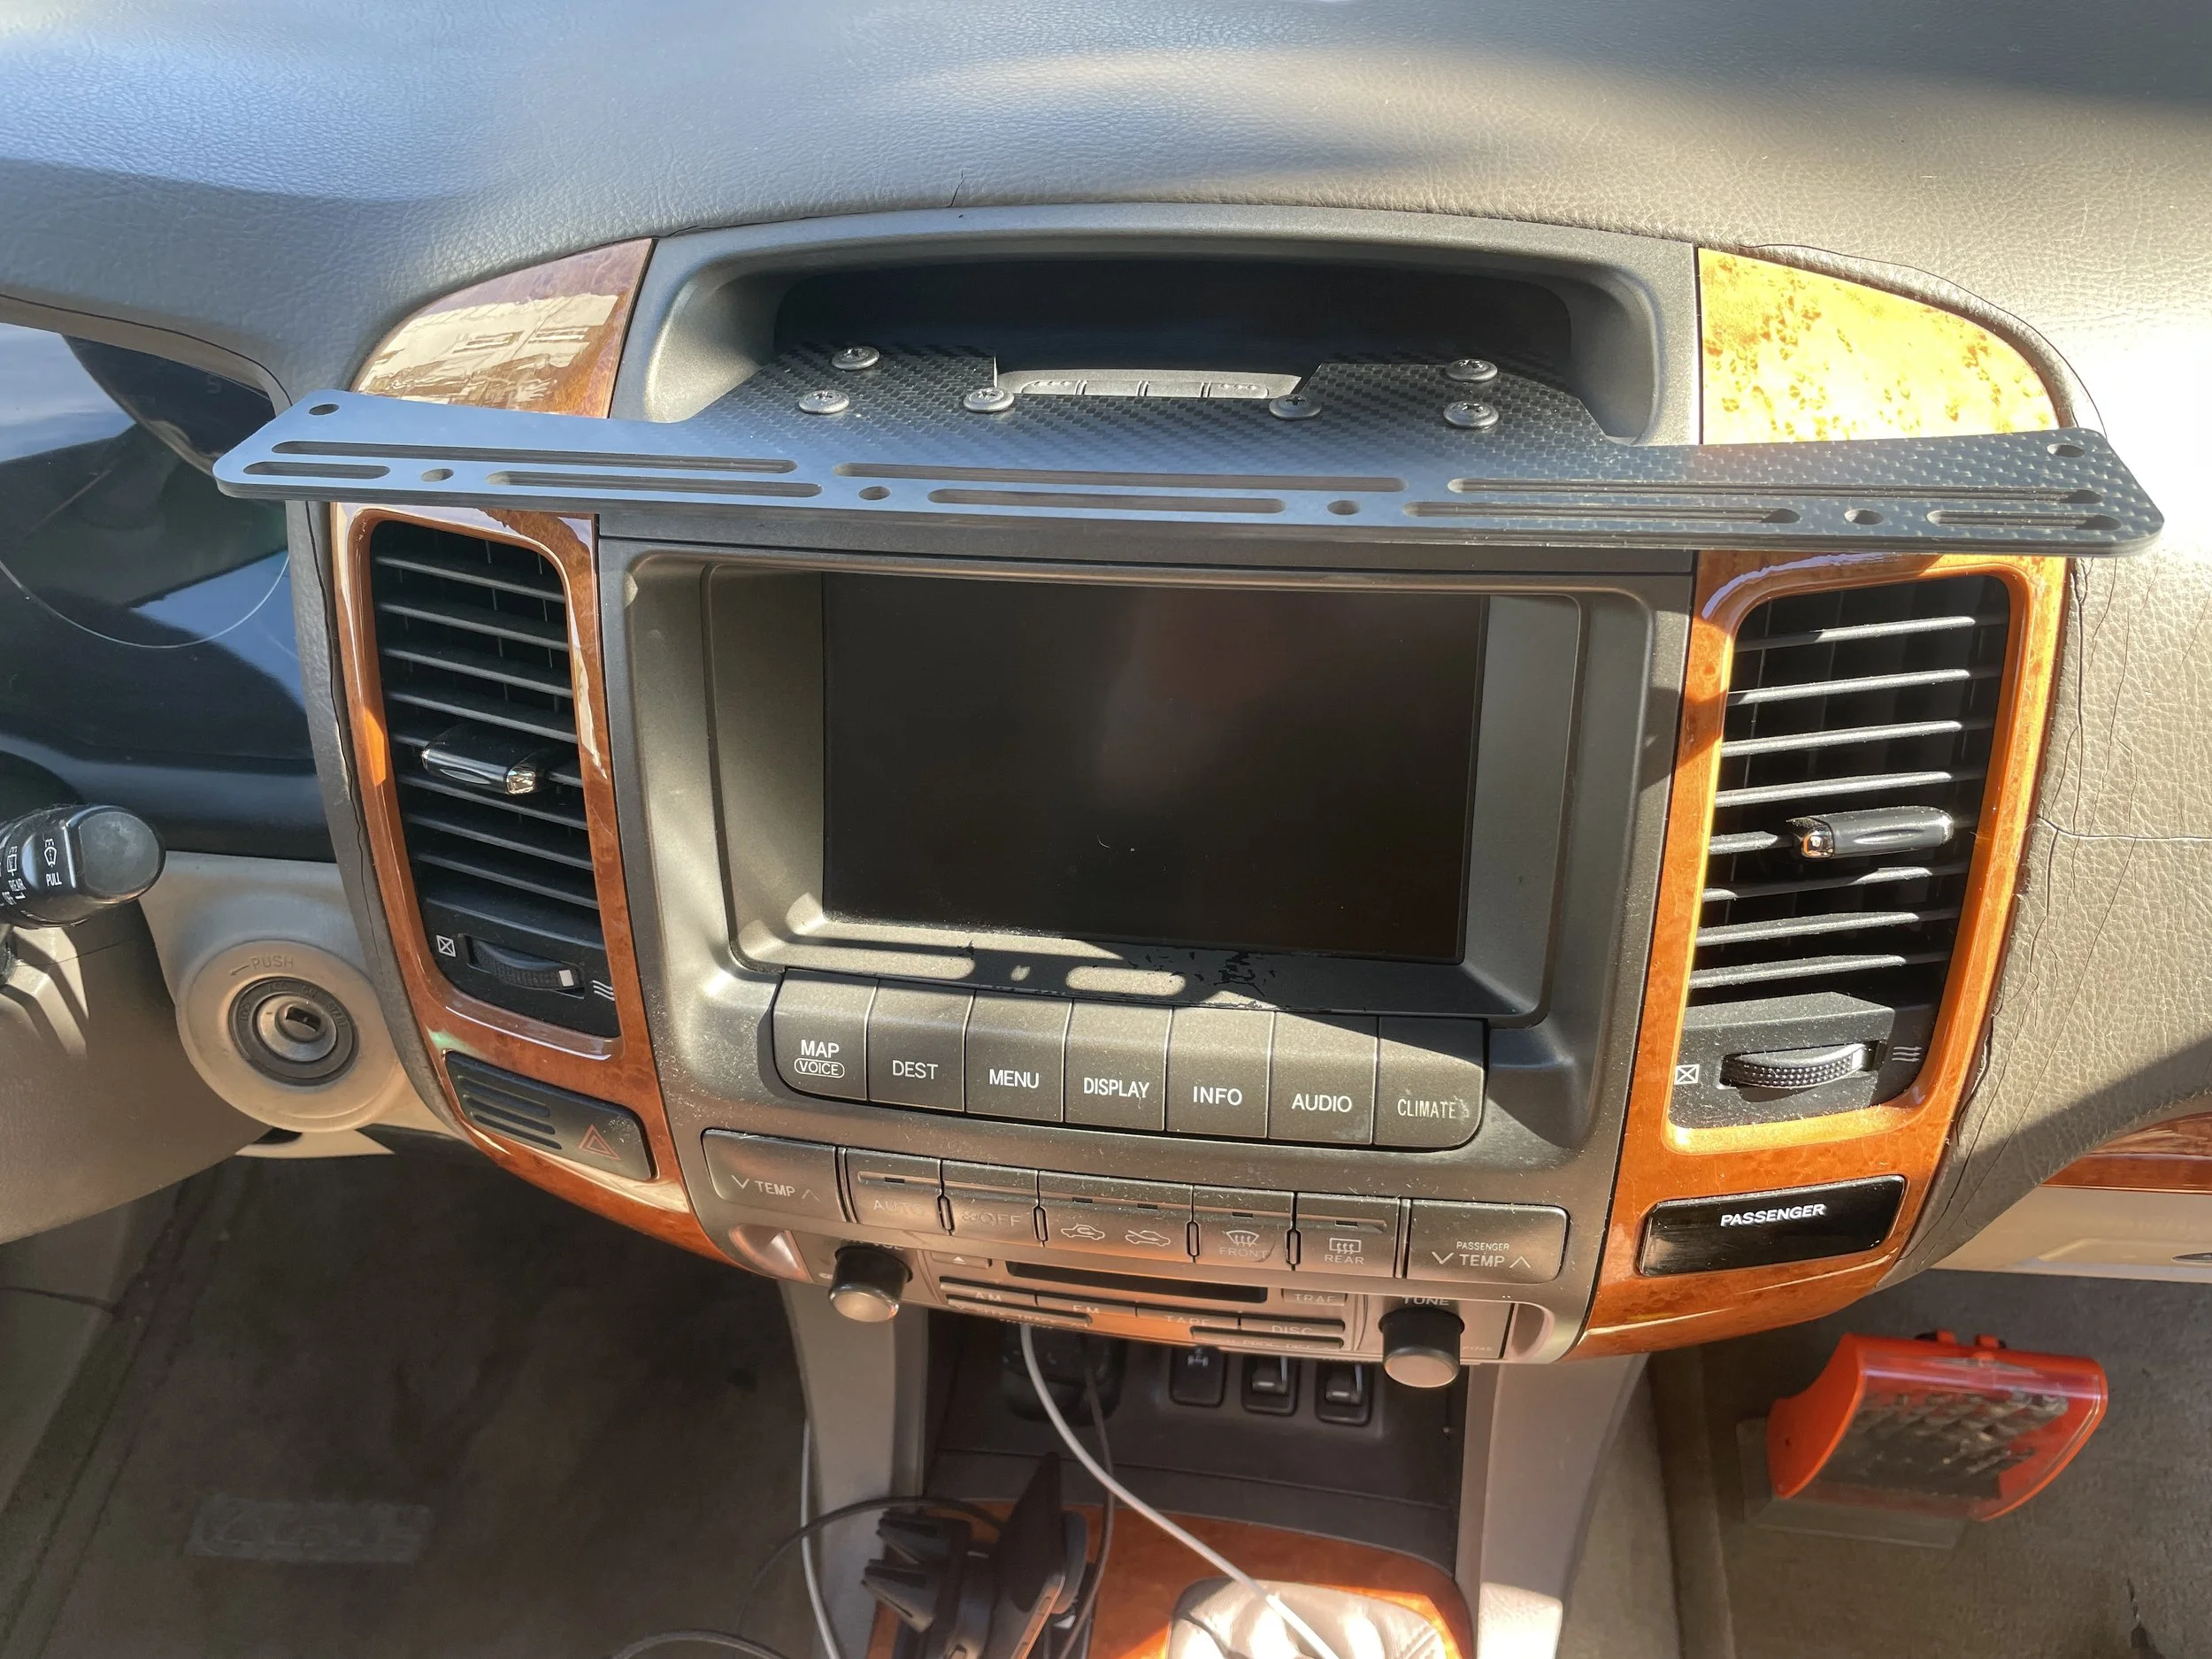
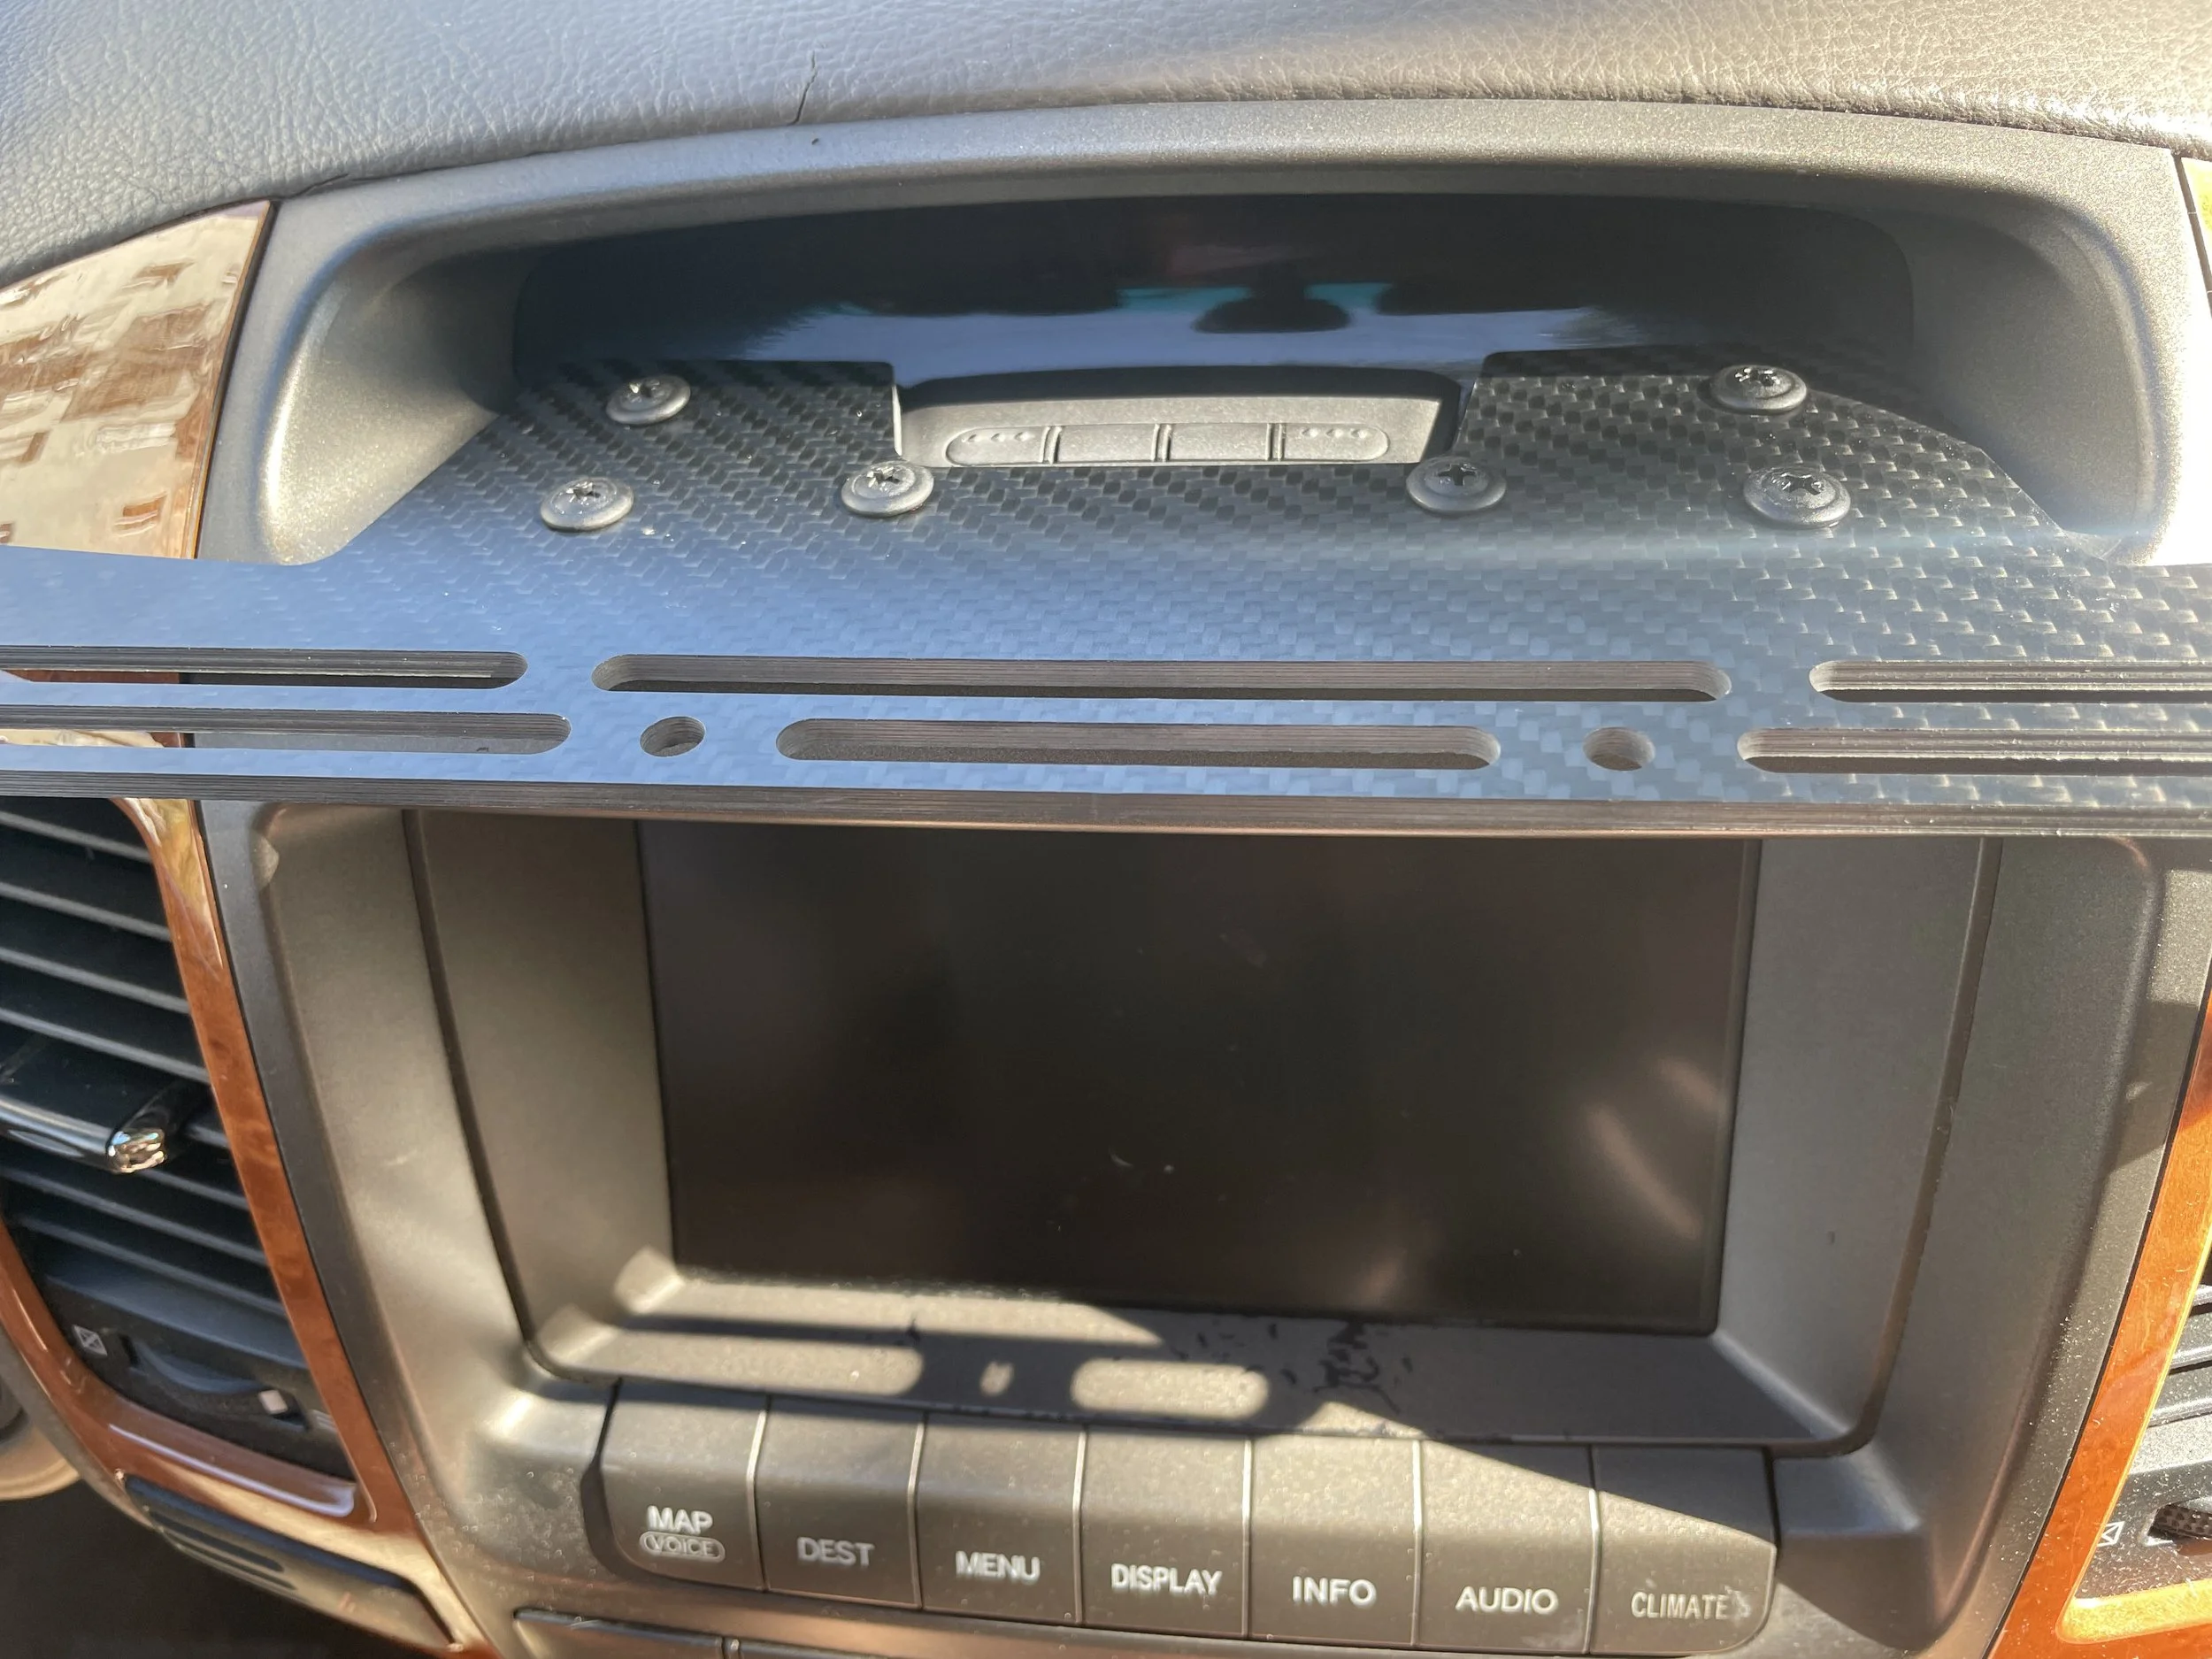
And here’s what the final product in carbon fiber looks like installed:


We’re offering the Comms Rail for pre-order; it’s available in powdercoated aluminum and carbon fiber. The first 50 units of each material are offered at a special pre-order discount through the end of January. After the pre-order period (or when the initial 50 in each material sell out), the price will increase slightly and we will order inventory in batches.
If you’re looking for the perfect mounting solutions to partner with your comms rail, we highly recommend the offerings from Tackform. Their mounts are compatible with other popular solutions like RAM and 67 Designs, but at a competitive price point in a variety of sizes. We’ve used a combination of Tackform gear along with a couple of RAM balls to configure our comms rails for 2 mobile devices, a Garmin InReach, our radio, and a Spotify Car Thing.
Please don’t hesitate to contact us if you have any questions about the Comms Rail (or any of our other products).